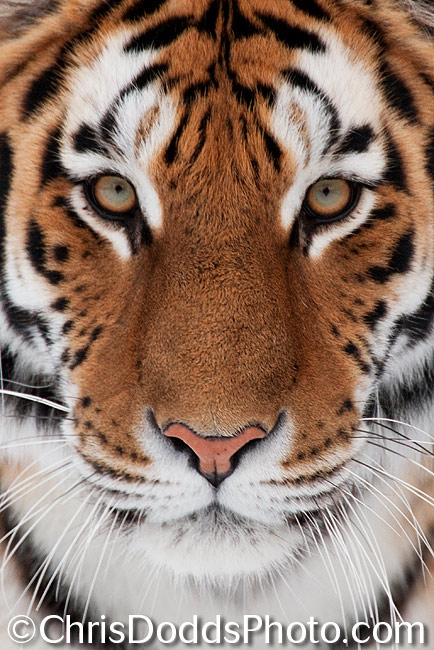
Siberian (Amur) Tiger Portrait Panthera tigris altaica (Tigre de L'Amour ou Tigre de Sibérie). CAPTIVE ANIMAL. Image Copyright ©Christopher Dodds www.chrisdoddsphoto.com All Rights Reserved. Canon EOS 1DsMKIII, 500mm F4 IS, 2X II Tele-converter Gitzo 1325 Tripod with Wimberley Head II. ISO 800, F8 @ 1/160s Manual mode. Ambient exposure using hand-held Sekonic L-358 Light Meter. Full Frame. CLICK HERE TO PURCHASE A PRINT or LICENSE IMAGE FOR PUBLICATION.
The in-Camera Light Meter:
Pretty much all digital cameras sold today include a built-in REFLECTIVE light meter. The volume of light measured by a reflective light meter varies relative to the color (or reflectance) of the subject, the background (and the subjects distance from it) and the chosen metering mode (or pattern); A Snowy Owl in a bright, snowy field reflects more light than a black bear on a dark, wet rock. Think of it this way: pure white reflects nearly all of the light that strikes it, and pure black reflects virtually none of the light that strikes it.
Left to it’s own devises, a digital camera in one of it’s automatic modes (Program, Aperture Priority or Shutter Priority) will use it’s built-in computer processor and programmed algorithms to determine the appropriate exposure settings such as shutter speed, f-stop (or aperture) and ISO to render the scene at what it thinks should be 18% grey, or a mid-tone (exactly mid way between the blackest black and the whitest white). The problem is a simple one; most cameras assume that everything they photograph reflects 18% of the light that falls onto them. Not everything we see or photograph is a mid-tone; with this method, we need to compensate to achieve the correct exposure for anything that is not a mid-tone; The Snowy Owl in a Snowy field we talked about earlier would be about two stops under-exposed, so we need to add about two stops of light to the metered reading to achieve the correct exposure. The black bear on the dark, wet rock will be about two stops overexposed, so we have to remove about two stops of light from the metered reading to achieve the correct exposure. A picture of the green grass on your front lawn is a middle tone and requires no compensation to achieve the correct exposure.
The problem gets much bigger when your subject starts to move from one colored background to another, or, moves closer or further away; can you imagine dialing in the correct exposure compensation, on the fly, as a white bird flies from a blue sky background to a dark cliff face background as it gets bigger in the frame while flying toward you? (smile) ... I didn’t think so.
Hand-held Light Meter:
The single best teaching aid that I know of is a hand-held light meter; students wanting to learn exposure theory tend to improve the exposure accuracy of their captures almost instantly when handed a hand-held light meter.
In it’s simplest form, a light meter measures light; We’ve discussed how your camera uses it’s meter to measure the light that is reflected from your subject, now let’s talk about how to measure the ambient light that falls onto your subject by using a hand-held light meter. If we can measure the AMBIENT light that falls onto the subject, we can successfully expose for the light (not the subject), and capture colors and tones as our eyes see them; white looks white, black looks black and middle tones still look like middle tones; just the same as our eyes see them. As long as you are in the same light as your subject, and the volume of light does not change between measurement and capture, you can take a reading and lock and load the chosen ISO, F-stop and shutter speed. Just like the sunny F/16 rule in my last post, you should still use your camera’s histogram to tweak the exact exposure to taste, and you should expose to the right and maximize that right most fifth of the histogram, as it contains 50% of the data in a digital capture. I typically add light to extract maximum detail from very dark subjects and remove light from very bright subjects, all the while ensuring I’m not clipping unrecoverable highlight detail.
On a clear day, from two hours after sunrise, until two hours before sunset, the light remains constant (provided it doesn't get cloudy, of course). If your subject flies from the blue sky to a dark cliff face, there is no need to make adjustments to your chosen exposure settings; the subject will be correctly exposed in manual mode.
A major difference between the old film days and digital is that instead of exposing for shadow detail on film, we now expose for the highlight. To ensure a correct exposure for the highlights, simply turn the meter’s dome toward the light source. To take a reading for the underside of a bird flying over your head, turn the dome toward the ground and to establish the correct reading for a subject in the shade, point the dome toward the light source and use your hand to shade the dome. It won’t take long to learn all about light, it’s volume and the correct exposure relative to it.
There are many light meters to choose from, but I find the best value to be the Sekonic L-358 Flash Master Light Meter