Black-and-White Warbler (Mniotilta varia, Paruline noir et blanc, BAWW)

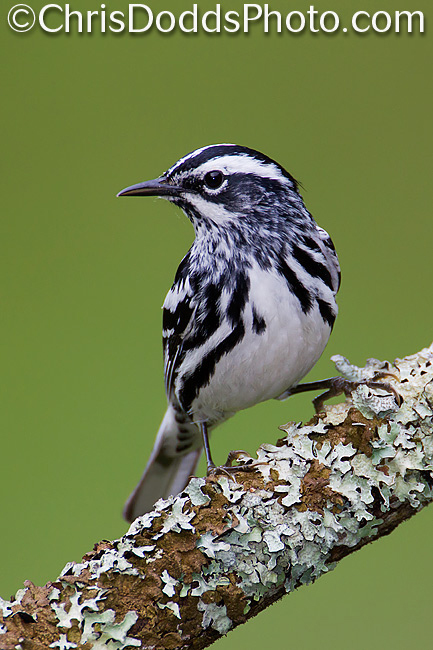
Black-and-white Warbler vertical portrait (Mniotilta vary, Paruline noir et blanc, BAWW) Point Pelee National Park of Canada (Southwestern Ontario, Canada). Image Copyright ©Christopher Dodds www.chrisdoddsphoto.com All Rights Reserved. Canon EOS-1D MKIV, 500mm F4L IS USM and 2X II Tele-extender. ISO 800, 1/320s F9. Canon 580 EX II Flash in manual mode. Tripod and Wimberley Head II. CLICK HERE TO PURCHASE A PRINT or LICENSE IMAGE FOR PUBLICATION.

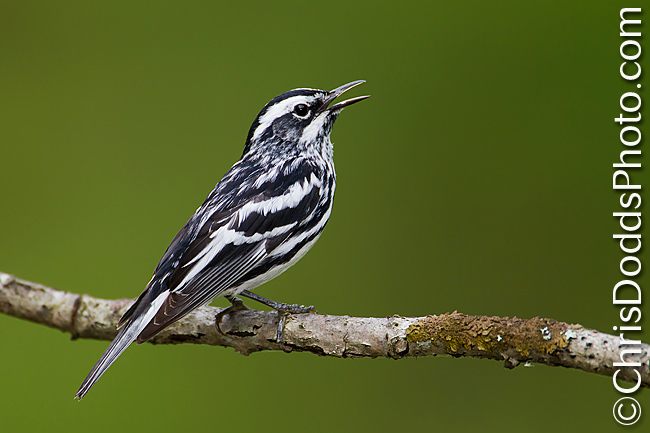
Black-and-white Warbler singing (Mniotilta vary, Paruline noir et blanc, BAWW) Point Pelee National Park of Canada (Southwestern Ontario, Canada). Image Copyright ©Christopher Dodds www.chrisdoddsphoto.com All Rights Reserved. Canon EOS-1D MKIV, 500mm F4L IS USM and 2X II Tele-extender. ISO 800, 1/320s F9. Canon 580 EX II Flash in manual mode. Tripod and Wimberley Head II. CLICK HERE TO PURCHASE A PRINT or LICENSE IMAGE FOR PUBLICATION.

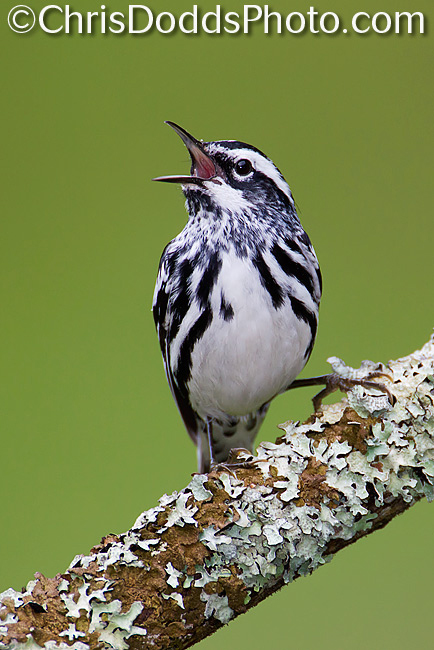
Black-and-white Warbler singing vertical portrait (Mniotilta vary, Paruline noir et blanc, BAWW) Point Pelee National Park of Canada (Southwestern Ontario, Canada). Image Copyright ©Christopher Dodds www.chrisdoddsphoto.com All Rights Reserved. Canon EOS-1D MKIV, 500mm F4L IS USM and 2X II Tele-extender. ISO 800, 1/320s F9. Canon 580 EX II Flash in manual mode. Tripod and Wimberley Head II. CLICK HERE TO PURCHASE A PRINT or LICENSE IMAGE FOR PUBLICATION.

Point Pelee Workshop report ... continued

In keeping with tradition, my annual bird photography workshop at the Southernmost tip of land in Canada, Point Pelee National Park of Canada, kept us all on our feet for hours at a time. We hiked far and wide while carrying our camera gear; Robert Parent (from Quebec) called it "Extreme Bird Photography". I would hate to think just how far we really did walk each day. Everyone in the group remained in good spirits, despite the cold, and sometimes wet, weather. These images of this Black-and-white Warbler were all made within minutes of each other, they are the same bird we found foraging a pile of discarded sticks along Woodland trail early in the workshop. I enjoyed using the relatively noiseless high ISO capabilities of Canon's newset professional camera body, the Canon EOS 1D mark IV. I have always forced myself to never use more than ISO 400 with it's predecessor, so pulling-off consitently sharp images in low light during this trip was much easier than with earlier cameras.

Canon Auto-focus, Instruction book, firmware, and LensAlign

I was sitting on the tram on the way to the tip discussing Canon's latest camera bodies when a well known photographer said that he wasn't happy with the 7D he had purchased for his wife. Quick check of the custom settings showed it still had the old firmware, few of the custom functions had been properly set-up , the camera was even set to sRGB colorspace and there had been no micro-adjustment made. I downloaded the latest firmware that night and installed it the next morning for him; making a few adjustments to his custom settings. "Its much better now" was shouted-out across the parking lot that afternoon.

Perhaps Canon unleashed a beast when they decided to offer such a wide variety of user defined custom functions; few people read the instruction manual and really know how to set them. Before you decide that your camer'a AF isn't working properly, take the time to make sure it is set-up and be sure to micro-calibrate each of your lenses using LensAlign Pro.....please!

Black-and-White Warbler (Mniotilta varia, Paruline noir et blanc, BAWW)

The Black-and-white Warbler, Mniotilta vary, Paruline noir et blanc, BAWW, has an unusually long hind toe and claw on each foot. This adaptation allows it to move securely on the surface of tree bark. They are known for their habit of creeping around tree trunks and along larger branches in search of insect food in crevices or under the bark; hence its old name, "Black-and-white Creeper." Unlike the Brown Creeper, which only moves up a tree, the Black-and-white Warbler can climb in any direction. Unusually aggressive for a warbler, the Black-and-white Warbler sometimes attacks and fights Red-breasted Nuthatch, Black-capped Chickadee, Tennessee Warbler, and other species. It is the only member of the genus Mnitila, which means "moss plucking".
The Northern Parula & Canon Professional Services (CPS) Revamped

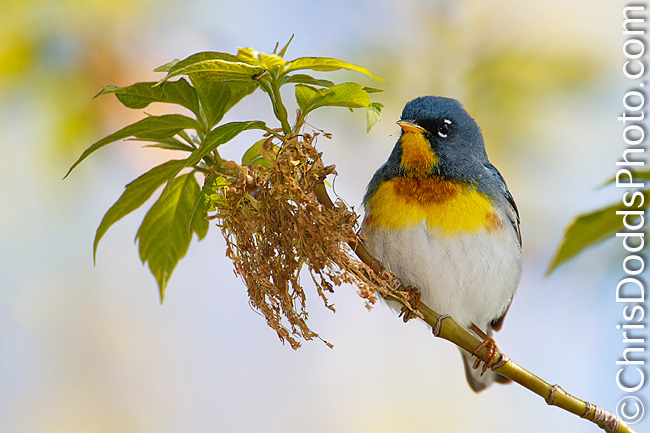
 Northern Parula Male , Parula americana (Paruline à collier) Point Pelee National Park of Canada (Southwestern Ontario, Canada). Image Copyright ©Christopher Dodds www.chrisdoddsphoto.com All Rights Reserved. Canon EOS-1D MKIII, 500mm F4L IS USM and 2X II Tele-extender. ISO 400, 1/500s F9 Manual mode. Canon 580 EX II Flash in manual mode. Tripod and Wimberley Head II. CLICK HERE TO PURCHASE A PRINT or LICENSE IMAGE FOR PUBLICATION.

Just going through some images from last year's Point Pelee bird photography workshop while preparing for this years. Photographing migrant Warblers is probably the most challenging type of bird photography; there is no food, bird calls or water drips to attract your subject. There's no choosing nice perches, and choosing great backgrounds is a result of your ability to move faster than your speedy subject. Migrant bird photography at a place like Pelee can be quite rewarding, though, many of the tree-top dwellers forage for fuel at near eye-level while migrating. The total number of bird species recorded at Point Pelee is 372, of which at least 340 of these species have been recorded during the spring migration period. The stream of birds in the spring is not a steady flow from the south. The birds usually arrive in intermittent waves, a pattern unique to eastern North America. In some years these are well marked but, in others the fluctuations in numbers and variety is so meagre that a wave in difficult to detect. A "wave" occurs as a result of a warm weather front advancing from the south or southeast meeting a cold weather front from the north or northwest. Two situations will cause the birds to descend. One is when the two fronts meet at ground level. The other is when a warm front in which migrating birds are flying overrides a cold front. The rising warm air becomes cooler with the increasing altitude until it is finally too cold for the birds and they descend.

If these nocturnal (night-time) migrants find themselves over Lake Erie near sunrise they must continue onwards or drown. After flying perhaps hundreds of kilometres in one night, it is this extra 30 to 40 kilometres across the lake that really demands their last strength. This explains why exhausted birds are sometimes found at the tip of the Point. A similar situation, but on a larger scale, occurs when migrants cross the 800 to 1000 kilometres of the Gulf of Mexico. If the weather is good they continue inland in one continuous flight without stopping, but with a north wind and rain they descend on the coast in great numbers, often in an exhausted state.

Do consider joining me at Point Pelee National Park this May 8-12, 2010 as I still have two spots available due to last minute cancellation. More information can be found HERE.

Canon Professional Service Revamped in Canada

Canon Canada has announced their revamped paid CPS program. Choose between Gold and platinum paid levels HERE. It seems to me that we are getting more for less, when compared the the Canon USA CPS program HERE while the Canon EUROPE CPS program is currently still offered FREE HERE.

There's a rumor circulating in Canada that the current discount on professional camera bodies and L Series lenses that Canadian CPS members currently enjoy will no longer be offered; this because there is no mention of it on the new CPS web site. Well my sources at Canon Canada tell me that CPS benefits never really did include a discount, it was offered to CPS members by the Canon Canada marketing people to offset the currency exchange rate that sent many pros across the border into the USA to shop. The good new is that the discount is still offered, and that there is no forseen end to it.

Nikon professional services, or NPS, in the USA is offered FREE HERE, in Canada, it's  FREE HERE and in Europe (Nikon Professional User) it's  FREE HERE

Coyotes, Canon EOS 1D Mark IV First Impressions and NatureScapes Radio Live

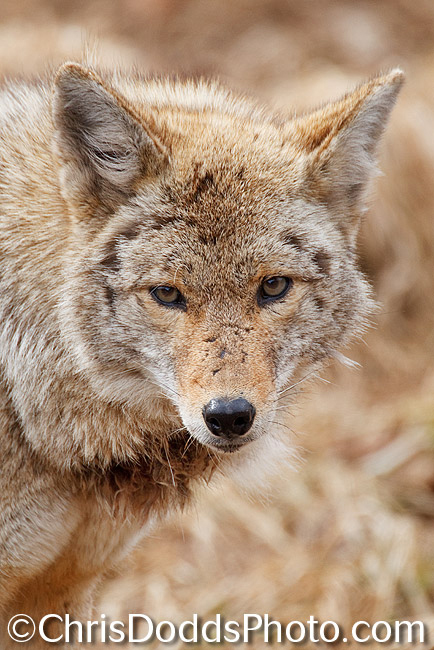
Coyote Alpha Male Portrait  (Canis latrans) Quebec, Canada (C) ©Christopher Dodds  www.chrisdoddsphoto.com All Rights Reserved. Canon EOS 1D Mark IV, 500mm F4 IS, Canon 2X II Tele-converter, Tripod & Wimberley Head II. ISO 400, 1/320s F8 Manual Mode. Full Frame. Click HERE to purchase a print or license an image for publication.

Coyote Adult female Portrait  (Canis latrans) Quebec, Canada (C) ©Christopher Dodds  www.chrisdoddsphoto.com All Rights Reserved. Canon EOS 1D Mark IV, 500mm F4 IS, Canon 2X II Tele-converter, Tripod & Wimberley Head II. ISO 400, 1/400s F8 Manual Mode. Full Frame. Click HERE to purchase a print or license an image for publication.

Coyote Alpha Male Skulking  (Canis latrans) Quebec, Canada (C) ©Christopher Dodds  www.chrisdoddsphoto.com All Rights Reserved. Canon EOS 1D Mark IV, 500mm F4 IS, Canon 1.4X II Tele-converter, Tripod & Wimberley Head II. ISO 400, 1/640s F5.6 Manual Mode. Full Frame. Click HERE to purchase a print or license an image for publication.

Coyote

It's amazing to see just how much this Alpha Male Eastern Coyote resembles a wolf; Coyotes have been known to occasionally mate with wolves. The offspring, known as a coywolf, are generally intermediate in size to both parents, being larger than a pure coyote, but smaller than a pure wolf. A study showed that of 100 coyotes collected in Maine, 22 had half or more wolf ancestry, and one was 89 percent wolf. A theory has been proposed that the large eastern coyotes in Canada are actually hybrids of the smaller western coyotes and wolves that met and mated decades ago as the coyotes moved toward New England from their earlier western ranges. The Red Wolf is thought by certain scientists to be in fact a wolf/coyote hybrid rather than a unique species. Strong evidence for hybridization was found through genetic testing, which showed that red wolves have only 5% of their alleles unique from either gray wolves or coyotes. Genetic distance calculations have indicated that red wolves are intermediate between coyotes and gray wolves, and that they bear great similarity to wolf/coyote hybrids in southern Quebec and Minnesota. Analyses of mitochondrial DNA showed that existing red wolf populations are predominantly coyote in origin.

Canon EOS 1D Mark IV First Impressions

I've now spent a considerable amount of time in the drivers seat of my Canon EOS 1D Mark IV and am loving every moment. From the new, and snappy, autofocus system to the superb image quality in low light at high ISO, this camera ROCKS! Be sure to download, read and digest the following from CPN Canon Professional Networks 1D Mark IV page:

Christopher Dodds on NatureScapes Radio Live April 6, 2010 @ 9PM EST!

Each month NatureScapes.net will be broadcasting a LIVE Pod Cast called "NatureScapes Radio LIVE!" 

NatureScapes Radio LIVE! will air live the first Tuesday of each month at 9PM EST.
Hosted by Dave Warner of LensFlare Live each show will feature friends E.J. Peiker and Greg Downing of NatureScapes.net as well as other guest photographers TBA (Christopher Dodds on April 6th, 2010). Listen LIVE or participate in the conversation while they talk about everything nature and wildlife photography from the latest and greatest gear to techniques and important issues affecting us all.

I was thrilled to be invited as Greg and E.J.'s first featured guest and look forward to answering all of your questions live at 9PM EST on April 6th, 2010. Click HERE for more information.


How to age the Northern Gannet (Morus bassanus)


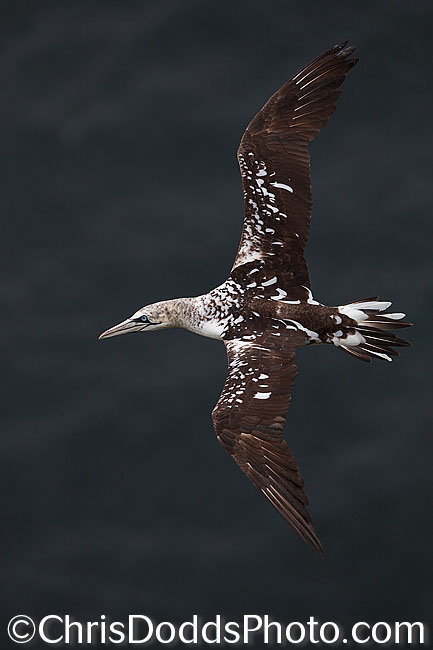
Northern Gannet second year Dorsal View, Morus Bassanus, Fou de Bassan Parc national de l'Île-Bonaventure-et-du-Rocher-Percé, Bonaventure Island, Quebec Image Copyright ©Christopher Dodds www.chrisdoddsphoto.com All Rights Reserved. Canon EOS 5D MKII, 300mm F2.8 IS Hand-held.  ISO 250, F4 1/2500s Manual. Full Frame. CLICK HERE TO PURCHASE A PRINT or LICENSE IMAGE FOR PUBLICATION.

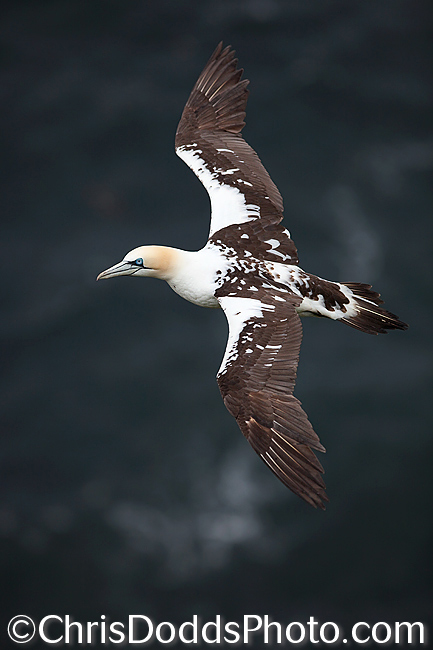
Northern Gannet third year Dorsal View, Morus Bassanus, Fou de Bassan Parc national de l'Île-Bonaventure-et-du-Rocher-Percé, Bonaventure Island, Quebec Image Copyright ©Christopher Dodds www.chrisdoddsphoto.com All Rights Reserved. Canon EOS 5D MKII, 300mm F2.8 IS Hand-held.  ISO 250, F3.5 1/2500s Manual. Full Frame. CLICK HERE TO PURCHASE A PRINT or LICENSE IMAGE FOR PUBLICATION.

Northern Gannet fourth year Dorsal View, Morus Bassanus, Fou de Bassan Parc national de l'Île-Bonaventure-et-du-Rocher-Percé, Bonaventure Island, Quebec Image Copyright ©Christopher Dodds www.chrisdoddsphoto.com All Rights Reserved. Canon EOS 5D MKII, 300mm F2.8 IS Hand-held.  ISO 250, F4 1/2500s Manual. Full Frame. CLICK HERE TO PURCHASE A PRINT or LICENSE IMAGE FOR PUBLICATION.

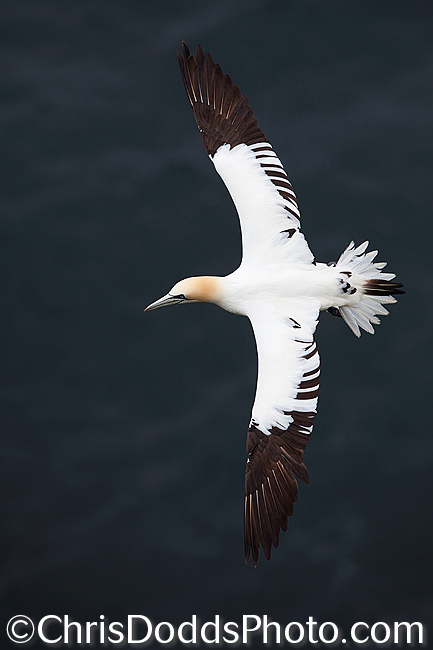
Northern Gannet fifth year Mature Adult Dorsal View, Morus Bassanus, Fou de Bassan Parc national de l'Île-Bonaventure-et-du-Rocher-Percé, Bonaventure Island, Quebec Image Copyright ©Christopher Dodds www.chrisdoddsphoto.com All Rights Reserved. Canon EOS 5D MKII, 300mm F2.8 IS Hand-held.  ISO 250, F4.5 1/2500s Manual. Full Frame. CLICK HERE TO PURCHASE A PRINT or LICENSE IMAGE FOR PUBLICATION.

After spending more than 350 days ,over the years, up at the Northern Gannet colony on Bonaventure Island, I have quite a collection of images. Last year, I found a new spot to photograph vertical dorsal views of these striking seabirds. Spending time with your subject is the best way to study and learn about their every behavior. Always remember to try to cover every aspect of behavior and every age possible. Remember that you can turn your camera to vertical for a fresh perspective.

There are still a couple of spots left for the June 18-20, 2010 Gannets Galore Photo Safari Workshop

Viola Wildlife Photographer of the Year Competition

If you haven't done so already, there's still time to enter this prestigious competition. Entries can be submitted HERE until 9AM, Monday, March 8th, 2010. Be sure to read the new rules, most notably the need to submit images from a DSLR with a minimum 10 Mega pixel resolution. Why the new rules? ... Who knows? You are allowed to lightly crop your image, so perhaps the rule would have been better stated as a minimum file size, instead of making every image from the single most popular wildlife photography camera in recent history, the Canon EOS 1D Mark II (and the EOS 1D Mark IIN), ineligible.

Even when this was called the BBC Wildlife Photographer of the year, I though (and still do) that this competition should be called the wildlife IMAGE of the year competition. I really do feel that such a prestigious title should be awarded to the photographer with the best portfolio of wildlife images. One lucky shot shouldn't earn the title of Nature Photographer of the year in my humble opinion.

Canon EOS 5D Mark II Firmware Update 2.0.3

Canon has announced that the long awaited, video-related firmware for its EOS 5D Mark II will be available from mid-March. Firmware version 2.0.3 enables full 1080p HD video recording at 24, 25 and 29.97fps to match the PAL and NTSC broadcast standards. It also adds a new histogram display while shooting movies and allows users to manually control sound recording levels. Audio sampling frequency has also been increased to match broadcast material standards.
Press Release:
Canon adds 24 and 25fps HD Movie recording 
to the EOS 5D Mark II with Firmware 2.0.3
London, 2nd March 2010 – Canon today pre-announces the release of a firmware update for the multiple award-winning EOS 5D Mark II. Originally announced in late 2009, the update adds 24* and 25 frames per second (fps) recording to the camera’s EOS MOVIE video function, and will be available as a free download from the middle of March.

Developed following feedback from photographers and cinematographers, Firmware 2.0.3 further enhances the EOS 5D Mark II’s excellent video performance. The addition of new frame rates expands the camera’s video potential, providing film makers with the ability to shoot 1080p Full HD footage at 24fps (actual 23.976fps) – the optimum frame rate for cinematic video. 25fps support at both 1920x1080 and 640x480 resolutions will allow users to film at the frame rate required for the PAL broadcast standard, while the new firmware will also change the 30fps option to the NTSC video standard of 29.97fps. 

A new histogram display for shooting movies in manual exposure, shutter-priority (Tv) and aperture-priority (Av) have been added, and exposure modes will also be available in movie mode. Improved audio functionality will allow users to set sound record levels manually using a sound-level meter displayed on the LCD screen. The audio sampling frequency has also been increased from 44.1KHz to 48KHz, providing the optimum audio signal typically required for professional or broadcast material.

With its full frame CMOS sensor and compatibility with Canon’s wide range of premium lenses, the EOS 5D Mark II is already recognised for its outstanding HD video performance. Launched in September 2008, the camera immediately created a wide range of new possibilities for photographers and videographers, and the addition of new frame rates and manual audio levels extends those possibilities even further – allowing movie makers to shoot stunning movies to suit practically any creative purpose.
Extreme sports photographer Richard Walch was one of the first to be given the chance to use the newly updated EOS 5D Mark II to shoot the snowboarding movie “I Love My Friends”. Commenting on the EOS 5D Mark II’s video performance, Richard said: “The addition of the new frame rates opens up a whole new range of possibilities. If you’re a cinematographer, independent film maker or just enthusiastic about making your own movies, get out there and give it a try”. 

“I Love My Friends” shot by Richard Walch on the EOS 5D Mark II with the new firmware includes a look behind the scenes video is available to view at http://www.canon-europe.com/eos5dmarkII. 

The firmware will be available to download from mid-March from the Canon website http://www.canon.com/eos-d/


The Fundamentals of Photography: Understanding the Light Meter

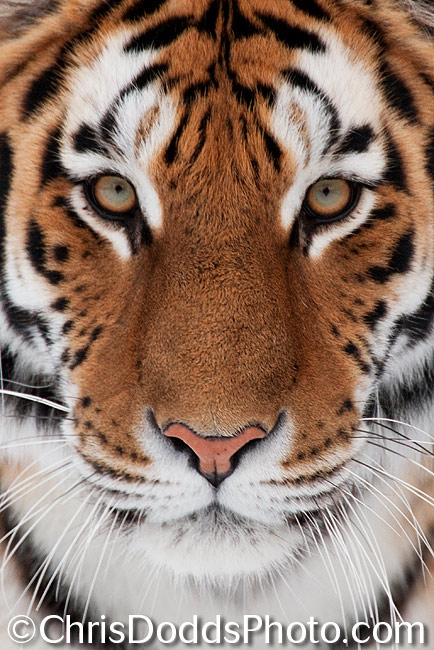
Siberian (Amur) Tiger Portrait Panthera tigris altaica (Tigre de L'Amour ou Tigre de Sibérie). CAPTIVE ANIMAL. Image Copyright ©Christopher Dodds  www.chrisdoddsphoto.com All Rights Reserved. Canon EOS 1DsMKIII, 500mm F4 IS, 2X II Tele-converter Gitzo 1325 Tripod with Wimberley Head II. ISO 800, F8 @ 1/160s Manual mode. Ambient exposure using hand-held Sekonic L-358 Light Meter. Full Frame. CLICK HERE TO PURCHASE A PRINT or LICENSE IMAGE FOR PUBLICATION.

The in-Camera Light Meter:

Pretty much all digital cameras sold today include a built-in REFLECTIVE light meter. The volume of light measured by a reflective light meter varies relative to the color (or reflectance) of the subject, the background (and the subjects distance from it) and the chosen metering mode (or pattern); A Snowy Owl in a bright, snowy field reflects more light than a black bear on a dark, wet rock. Think of it this way: pure white reflects nearly all of the light that strikes it, and pure black reflects virtually none of the light that strikes it.
Left to it’s own devises, a digital camera in one of it’s automatic modes (Program, Aperture Priority or Shutter Priority) will use it’s built-in computer  processor and programmed algorithms to determine the appropriate exposure settings such as shutter speed, f-stop (or aperture) and ISO to render the scene at what it thinks should be 18% grey, or a mid-tone (exactly mid way between the blackest black and the whitest white). The problem is a simple one; most cameras assume that everything they photograph reflects 18% of the light that falls onto them. Not everything we see or photograph is a mid-tone; with this method, we need to compensate to achieve the correct exposure for anything that is not a mid-tone; The Snowy Owl in a Snowy field we talked about earlier would be about two stops under-exposed, so we need to add about two stops of light to the metered reading to achieve the correct exposure. The black bear on the dark, wet rock will be about two stops overexposed, so we have to remove about two stops of light from the metered reading to achieve the correct exposure. A picture of the green grass on your front lawn is a middle tone and requires no compensation to achieve the correct exposure.
The problem gets much bigger when your subject starts to move from one colored background to another, or, moves closer or further away; can you imagine dialing in the correct exposure compensation, on the fly, as a white bird flies from a blue sky background to a dark cliff face background as it gets bigger in the frame while flying toward you? (smile) ... I didn’t think so.

Hand-held Light Meter:

The single best teaching aid that I know of is a hand-held light meter; students wanting to learn exposure theory tend to improve the exposure accuracy of their captures almost instantly when handed a hand-held light meter.
In it’s simplest form, a light meter measures light;  We’ve discussed how your camera uses it’s meter to measure the light that is reflected from your subject, now let’s talk about how to measure the ambient light that falls onto your subject by using a hand-held light meter. If we can measure the AMBIENT light that falls onto the subject, we can successfully expose for the light (not the subject), and capture colors and tones as our eyes see them; white looks white, black looks black and middle tones still look like middle tones; just the same as our eyes see them. As long as you are in the same light as your subject, and the volume of light does not change between measurement and capture, you can take a reading and lock and load the chosen ISO, F-stop and shutter speed. Just like the sunny F/16 rule in my last post, you should still use your camera’s histogram to tweak the exact exposure to taste, and you should expose to the right and maximize that right most fifth of the histogram, as it contains 50% of the data in a digital capture. I typically add light to extract maximum detail from very dark subjects and remove light from very bright subjects, all the while ensuring I’m not clipping unrecoverable highlight detail.
On a clear day, from two hours after sunrise, until two hours before sunset, the light remains constant (provided it doesn't get cloudy, of course). If your subject flies from the blue sky to a dark cliff face, there is no need to make adjustments to your chosen exposure settings; the subject will be correctly exposed in manual mode.

A major difference between the old film days and digital is that instead of exposing for shadow detail on film, we now expose for the highlight. To ensure a correct exposure for the highlights, simply turn the meter’s dome toward the light source. To take a reading for the underside of a bird flying over your head, turn the dome toward the ground and to establish the correct reading for  a subject in the shade, point the dome toward the light source and use your hand to shade the dome. It won’t take long to learn all about light, it’s volume and the correct exposure relative to it.

There are many light meters to choose from, but I find the best value to be the Sekonic L-358 Flash Master Light Meter

Basic Exposure Theory: The Sunny F/16 Rule Explained

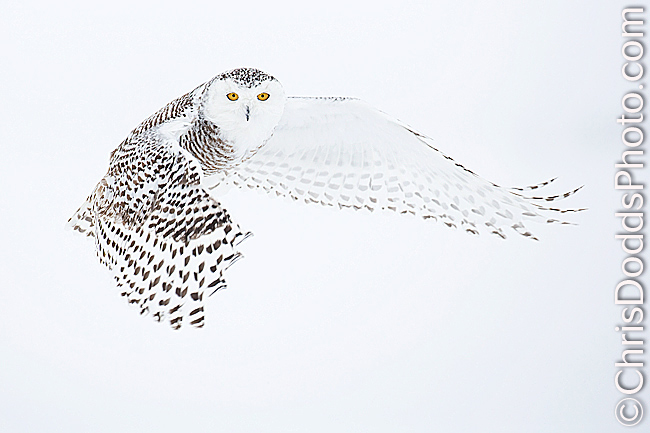
Snowy Owl Bubo scandiacus (Harfang des neiges) Casselman, Ontario. Image Copyright ©Christopher Dodds  www.chrisdoddsphoto.com All Rights Reserved. Canon EOS 1DsMKII, 500mm F4 IS ISO 400, F5.6 1/1600s Manual mode. Full Frame. The chart below (in the cloudy bright column) shows the correct exposure to be ISO 400 F/11 @ 1/400s. I chose to stop the action by using a higher shutter speed, so I used the equivalent exposure of ISO 400 F/5.6 @ 1/1600 second. I also knew to expect less detail in the snow and white feathers, because there are no shadows to help define them.

What you shooting at there, Dodds?” echoed across the landscape as I set-up to photograph Snow Geese and Sandhill Cranes in New Mexico about a year ago. “What exposure you at Dodds?” was the question asked by the same gifted photographer just recently. I don’t want to embarrass anyone, so I won’t mention any names here. I truly do think that he is a gifted and talented photographer. He’s widely published and is also the first person to admit that he doesn't really know all the “techie” stuff.....and he was much closer to my exposure this year, than last. 

The single most important skill a photographer should have is a basic understanding of the fundamentals of photography. The most important tool, and the least understood aspect of photography is exposure theory. I learned photography with a totally manual camera and used slide film (seems like so long ago), so a basic understanding was necessary to make successful images.

 Q: Why bother when I can just keep things simple and take a picture, check the histogram and make any adjustments necessary? 

 A: Because having an intimate knowledge of exposure theory and your cameras functions and controls helps you grow and improve as a photographer, make better decisions and better images as a result.

In it’s simplest form, the Sunny 16 rule (or Sunny F/16 rule) states: On a bright, sunny day, the correct exposure for any middle tone subject is F/16 at the shutter speed nearest to the reciprocal of the film speed. For example:

ISO 100 = 1/100 second @ F/16

ISO 200 = 1/200 second @ F/16

ISO 400 = 1/400 second @ F/16

ISO 800 = 1/800 second @ F/16

Now we have established the correct exposure, it’s time to decide if we need more depth of field or shutter speed. Each step up, or down, of one variable represents a doubling, or halving, of any other variable. If you need more shutter speed than 1/100 second @ F/16 (ISO 100), then an equivalent exposure would be ISO 100 1/1600 second @ F/4.


This chart illustrates the equivalent exposures for ISO 100 and 200. Each setting above will allow the same amount of light to fall on your digital cameras sensor, or film cameras film. The exposure is the same, with the only difference being either your shutter speed (to freeze or blur action) or the depth of field (very narrow to blur the background, or very large to capture an entire grand landscape sharp).

But wait! It got cloudy. Now what? The Sunny F/16 rule is actually the correct ambient exposure for an average subject under bright sunny conditions. If the sun goes behind a cloud, then the light falling onto your subject is decreased and you must make an adjustment to your basic exposure settings. Here are some aperture settings for some different daylight situations:


This is intended as a starting point, so there are exceptions. Backlight or sidelight both require adjustments to reach the correct exposure. It’s a good idea to expose to the right with your digital camera; 50% of the recorded data is recorded on the right fifth (or 20%) of your digital cameras histogram. With very light subjects in very bright conditions, I routinely subtract light so as not to clip the highlights. With very dark or black subjects, I tend to add light to maximize the recorded detail. Notice the technicals for the Snowy Owl in my previous post; ISO 200 F9 1/1600 second = ISO 200 F22 1/1250 second (or Sunny F/16 rule for light sand or snow) minus 1/3 stop to preserve all of the details in the whites without clipping (or loosing) any data.

Sounds complicated, but if you spend some time digesting and thinking about everything here; you'll be able to get that once in a lifetime shot accurately and consistently with confidence. Not to mention how much you will impress the boys (or girls) when you are all standing around waiting for the shot or talking shop.

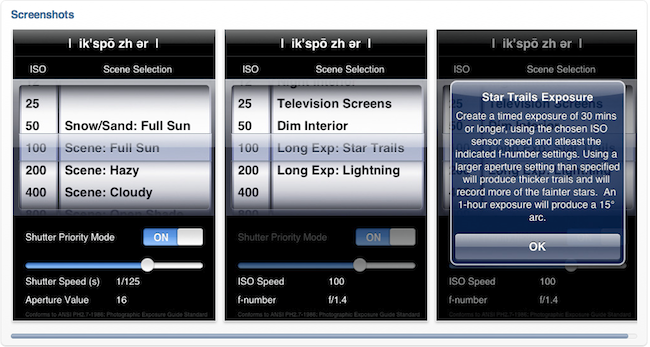
If you own an iPhone or iPod touch, there's a great application available for $1.99 called Exposure Calc. I just found it while writing this blog entry and think it is a great learning aid and pocket reference.

If you don't get it, and need to take a test shot, check the histogram, make adjustments, take another test shot; that's okay too, as long as you're having fun and making the odd good image to keep you interested.

Comments welcome & appreciated.

The Business of Photography: Negotiation


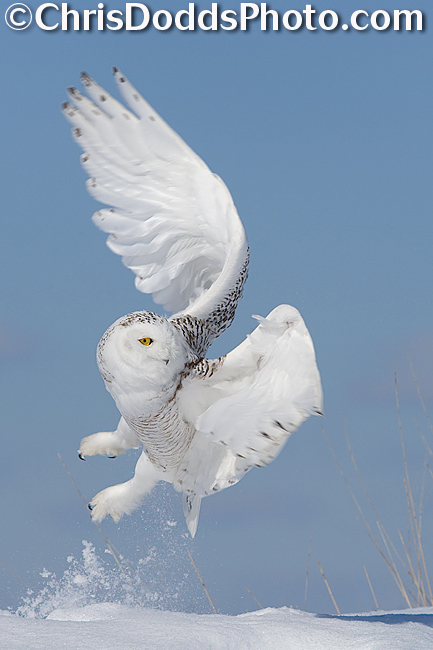
Snowy Owl Blast-off Bubo scandiacus (Harfang des neiges) Quebec. Image Copyright ©Christopher Dodds www.chrisdoddsphoto.com All Rights Reserved. Canon EOS 1DsMKII, 300mm F2.8 ISO 200, F9 1/1600s Manual mode. Full Frame. CLICK HERE TO PURCHASE A PRINT or LICENSE AN IMAGE FOR PUBLICATION.

Top 10 Negotiation Tips:

To succeed in any business, particularly as a photographer, we have to compromise from time to time. The trick is to compromise without loosing what you really need to accomplish your goals.
  1. Learn to ask for what you want: We often fail to ask for a better price or better terms because we are afraid of failure. A good negotiator starts with a clear understanding of what they want, and what they don’t want. People new to negotiation feel it’s awkward to ask for a lower price or better terms. Anyone trying to buy or sell anything will be happy to consider any reasonable offer to help close the deal.
  2. Eliminate disadvantages by acting quickly and decisively. Having a plan and knowing what your goals are is the best way to react quickly to offers or counteroffers. In todays connected world, waiting to reply during negotiations allows the other party time to seek other options.
  3. Deal with the decision maker, but don’t be afraid to have someone who isn’t the decision maker negotiate for you. Use the power of your friendships with other people in the organization you are dealing with to help move the negotiations along in your favour.
  4. Learn to listen. If you are talking; then you are not listening. Good negotiators are good listeners and good communicators. Those that do all of the talking during the negotiation process are usually the ones who loose; they don’t take the time to hear the other sides needs and concerns. By learning to listen, the other side will quite often tell you everything you need to know to win.
  5. Leave your emotions out of the negotiation process and keep your cool. The moment you get angry is the moment you loose. You should not avoid discussing important issues, just avoid discussing them in a heated argument. Negotiations should not be arguments, but avoiding tough issues is not productive.
  6. Don’t make a threat unless you are ready to follow through. 
  7. Remember the power of conversation. It’s easy to misinterpret the tone of an email. Don’t be shy to pick-up the phone and make a phone call. Embrace the spoken word.
  8. Don’t negotiate away from what’s important to you. Remember rule number one.
  9. Don’t be afraid to walk away from a bad deal. Better to have no deal than one you will regret with time.
  10. Get it in writing. I find the best usage licenses are the ones I’ve written myself. Using a standard form contract is a good indication that no negotiations took place.


                         Learn it all. Learn it fast. Learn it now.


National Geographic Traveller rates Gaspé #3 Best-Rated Travel Destination in the world

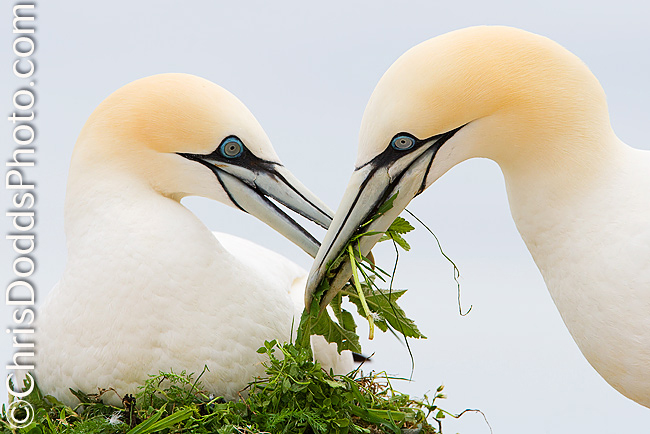
Northern Gannets LOVE, Morus Bassanus, Fou de Bassan Bonaventure Island, Quebec ©Christopher Dodds www.chrisdoddsphoto.com All Rights Reserved. Canon EOS 1DsMKII, 300mm F2.8 and 1.4XII Tele-converter  ISO 250, F8 1/800s Manual. CLICK HERE TO PURCHASE A PRINT or LICENSE AN IMAGE FOR PUBLICATION.

National Geographic Traveler Magazine rates Gaspé number 3 destination in the world:

Subject to development, mass tourism, pollution, globalization - are the world's great places still...great? Jay Walljasper writes on page 50 of the November / December 2009 edition of National Geographic Traveler Magazine, Gaspé ranks # 3 in the world - Congratulations Gaspé!
jutting into the Gulf of St. Lawrence, the colorful Gaspé Peninsula  offers "oceanfront, islands, and inland mountains" within "excellent parks and reserves," along with "authentic Francophone" villages. A big part of the area's appeal is "tourism development largely on a human scale." READ MORE HERE

Click HERE for more information on the Gannets of Bonaventure Island Photo Safari at The Parc National de l'Île-Bonaventure-et-du-Rocher-Percé and my very favorite bird photography location on planet Earth!

Testimonial

"I just returned from attending my first workshop, my first time in “the Gaspé” and my first experience with shooting birds in flight and I thought I’d share a bit about the experience…

The workshop was given by Christopher Dodds who is often referred to as one of the very best nature photographers in Canada. We were going to spend three days shooting Gannets on L’Ile Bonaventure, Québec (about 30 minutes off the Percé harbour and close to the famous Percé Rock). The Island is a protected habitat for Gannets and access to the Island is only allowed when the Parks Canada staff are there from about 9am to 5pm.

It’s a long uphill climb from the wharf to the top where the birds are, and Park staff say most people take about 45 minutes to an hour. Chris and I made it in about 30 minutes the first day (and got it down to about 25 minutes the following days but if he wanted to, I’m sure Chris could do it in 15!). We could hear the Gannets long before we got to the top and the first view of them – literally thousands and thousands of them – was breathtaking. The unofficial current estimate is at over 500,000 Gannets, now making this the largest colony in the world!

I can't speak highly enough about the experience of shooting with Chris Dodds. Chris is absolutely amazing. He's got tremendous experience and a great eye. The whole experience was way better than my expectations. He’s a far better photographer and workshop leader than I expected. Not only does he produce incredible work, he has the technical knowledge and experience to make this a really worthwhile learning experience. And he gives what is truly a “workshop”, in that he gives constant tips and coaching to make sure all participants are learning (no matter what their experience is or how stubborn and set in their ways they might be – like myself). He doesn’t just lead you to a subject (as many other workshops do), but he gives all the technical support and training you could wish for; he makes sure you are learning the photo techniques needed to improve. Chris and I knocked heads quite a bit those first days (he was right – I was wrong) as he stuck with trying to get me to improve and get out of my comfortable rut.

I liked those three days (and the one pre-workshop day) so much that I decided to stay for a second three-day workshop and luckily Chris still had a spot available. Not only that, but I’m certainly going to return to shoot those Gannets again, hopefully with Chris. In fact I’d love to take any workshop Chris was leading.

We were shooting ALL day... from the time we got to the top until we had to leave. There was absolutely no shortage of birds or birds in flight and that's unlike any other avian photography venue in the world from what everyone was saying. Elsewhere you only have a few hours to shoot and then the birds are gone. We were always the first ones on the Island (with the Park staff) and the last ones to leave (again with the staff).

Chris is so well known there (and so highly regarded) that he and his group were certainly given privileges and access that someone on their own wouldn't get. If (I should say when) I do this again, I'm going to do it with Chris on one of his workshops.

And with Chris, everything was organized for us including lunches; access and transportation to the island, accommodations and of course the great training. I wouldn't do it any other way.

Believe me, if you took such a workshop with Chris you wouldn't regret it! And his repeat clients (of which there were many in both the 3-day workshops I attended) had nothing but raves for him.

An absolutely fabulous time!
"

Eldor Gemst | Montreal | QC | Canada

Comments welcome & appreciated.


Northern Harrier & " Stressful Jobs that Pay Badly"

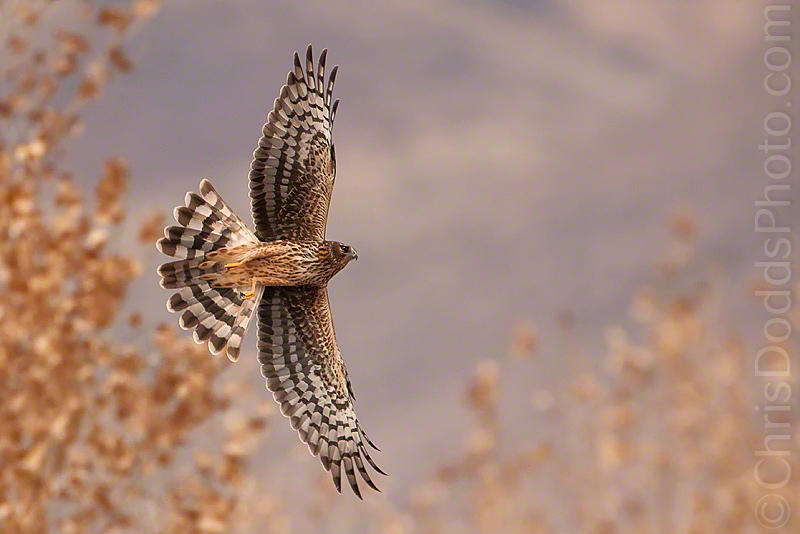
Northern Harrier   (Circus cyaneus, Busard Saint-Martin) Bosque del Apache National Wildlife Refuge, New Mexico, USA ©Christopher Dodds All Rights Reserved. Canon EOS 1Ds Mark III, 500mm F4 IS, 2X II Tele-converter, Canon 580 EXII Flash with Better Beamer, Gitzo tripod and Wimberley Head II  ISO 400, F8 1/800s Manual Mode. Full Frame. Click HERE to order a print or license image for publication.

Northern Harriers have owl-like facial disks to help with directional hearing; unusual among hawks, they use their sense of hearing to locate prey.

This article from CNNMoney.com caught my eye when someone posted a link to it on FaceBook. They forgot to mention that no matter what your area of expertise, there is always a pile of people who don't depend on photography to earn their living; and those people will all do the job for 1/10 the price, or even free. I remember when I used to charge $5,000.00 for a wedding and there were always another ten "photographers" charging $500.00; you do get what you pay for. Most people think that the life of a professional photographer is glamorous and well paying....Sigh, smile.

Click on the image to go directly to the CNN article.


Comments welcome & appreciated.


Photo Competition: Buyer Beware!

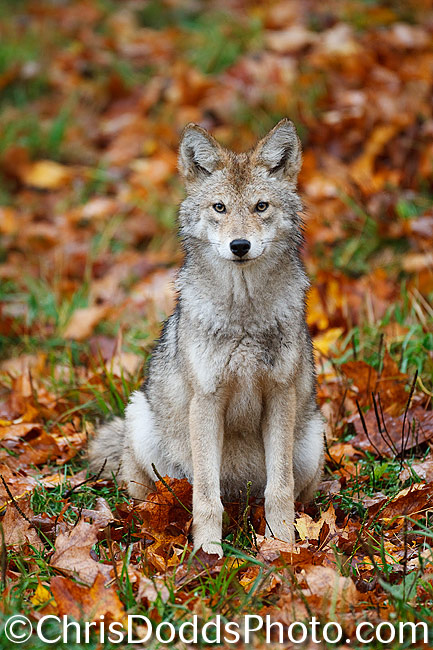
Coyote Autumn pup  (Canis latrans) Quebec, Canada (C) ©Christopher Dodds  www.chrisdoddsphoto.com All Rights Reserved. Canon EOS 1DsMark III, 500mm F4 IS, Gitzo Tripod & Wimberley Head II. ISO 500, 1/160s F4 Manual Mode. Full Frame. Click HERE to purchase a print or license image for publication.


So, you work for a magazine and your publisher is trying to squeeze a profit out of your magazine during these difficult economic times. Earning kudos from the boss may be easier than you would think: Just announce a photo competition where all entrants assign all publication rights (editorial, commercial & educational) AND they send a $20.00 bill with each submission. Just 1,000 entrants produces an image bank of at least that many images AND $20,000.00 for the magazine. The grand prize: get you picture published in the magazine. The most shocking part is how hard it was to find the fine print and I'm sure most people who sent off a cheque never read it. Oh, I almost forgot: the magazine does not have to pay publication rights to photographers anymore. Just something to think about next time you think about entering a competition…

Entries become the property of (insert magazine name here), a division of (insert company name here) Inc., which reserves the right, without further consideration, to use all photos and text in any publication, media, and related prodcts or promotions. The company cannot confirm receipt or return entries. By submitting your materials, you agree that your contact information may be given to the contest sponsor, which may use the information for marketing purposes. You further agree that your photo, text, name, and city and state may be posted on (insert company name here)-owned websites and, on sponsor websites, as well. If you are younger than 13 years of age, you will need to provide signed permission from a parent or guardian allowing you to enter the contest. - REAL FINE PRINT FROM A REAL PHOTO COMPETITION 

The Coyote , Canis latrans, runs with it's tail down, unlike domestic dogs with their tail up or wolves with their tail straight. Known as the best runner among the canids, the Coyote cruises at 25-30 mph (40-50km/h), with a top speed of 40 mph (65 km/h). Always an opportunist, Coyotes eat small mammals like mice, squirrels and rabbits, as well as birds, frogs, toads snakes, insects and fruit.

Comments welcome & appreciated.